Installing and using FileZilla
Introduction
This guide details how to use SFTP with the Horizon Hosting gamepanel. This can be advantageous as SFTP allows for faster, bulk file transfer. However, it is not as intuitive as using the gamepanel’s inbuilt file manager. This guide details how to install and setup FileZilla, a popular SFTP client. There is also a video available at the bottom of this page.
SFTP is a variant of the File Transfer Protocol (FTP) that allows for secure transfer. These days, SFTP is generally preferred.
FileZilla Setup
Downloading and Installing FileZilla
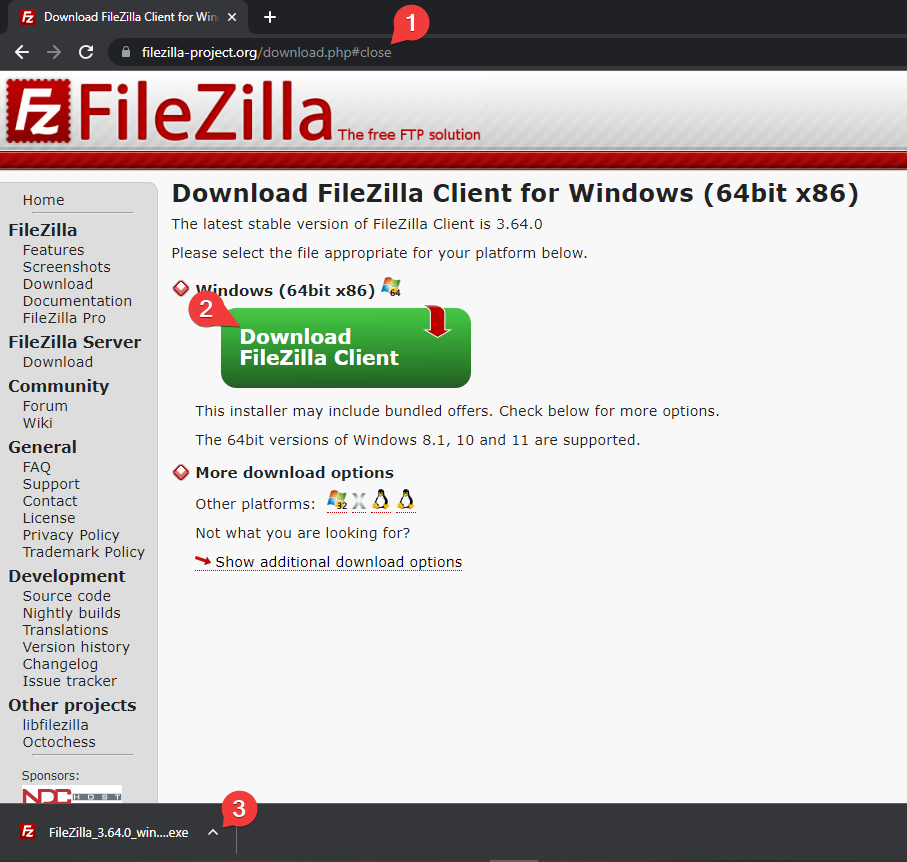
- Navigate to the FileZilla Client download page
- Click “Download FileZilla Client”
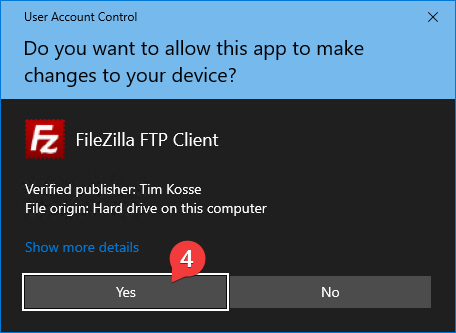
- Run the downloaded file
- If prompted, click “Yes” on the User Account Control prompt.
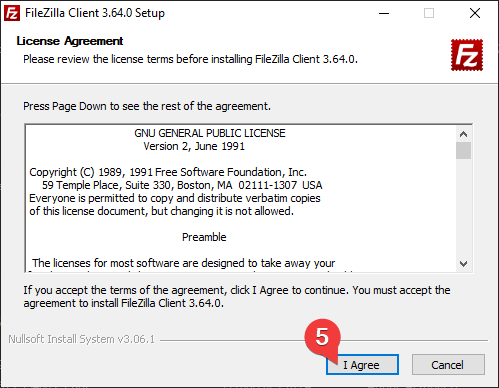
- Agree with the license agreement
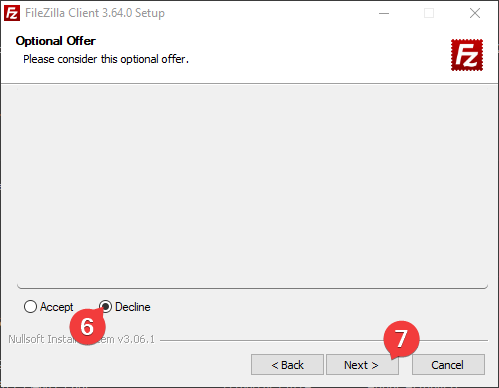
- Decline the optional offer
- Click next
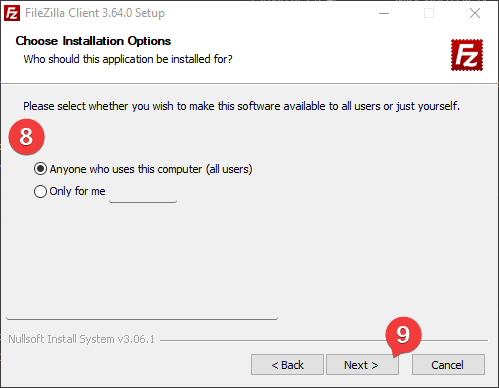
- Select who you would like FileZilla to be installed for.
- Click next
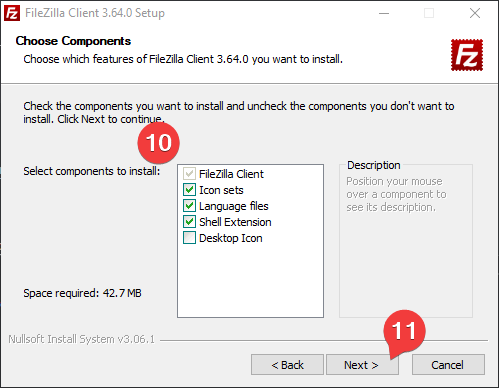
- Select which components you want. Gernally, the default selection is okay. If you would like a FileZilla icon on your desktop, select this option.
- Click next
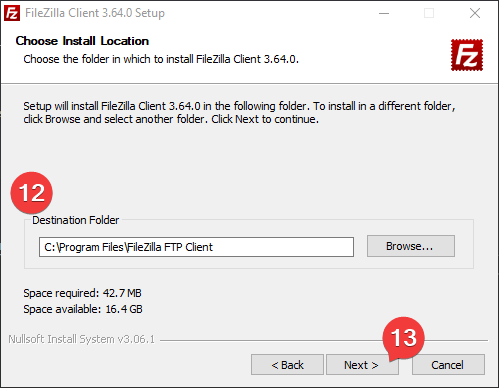
- Choose a folder to install FileZilla to. Changing this is not neccessary
- Click next
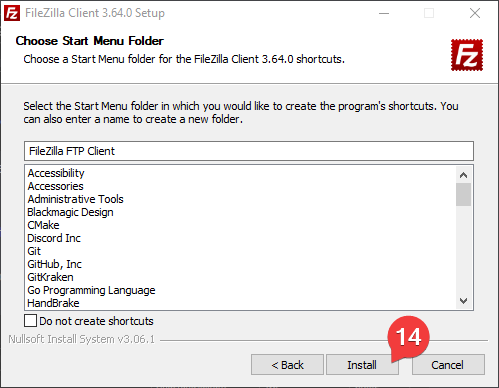
- Click install
- Once the install is complete, click finish
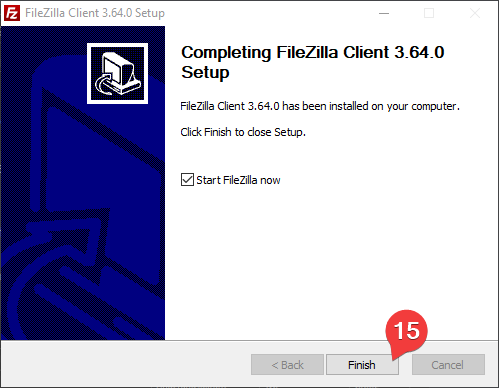
FileZilla is now installed.
Connecting to your server
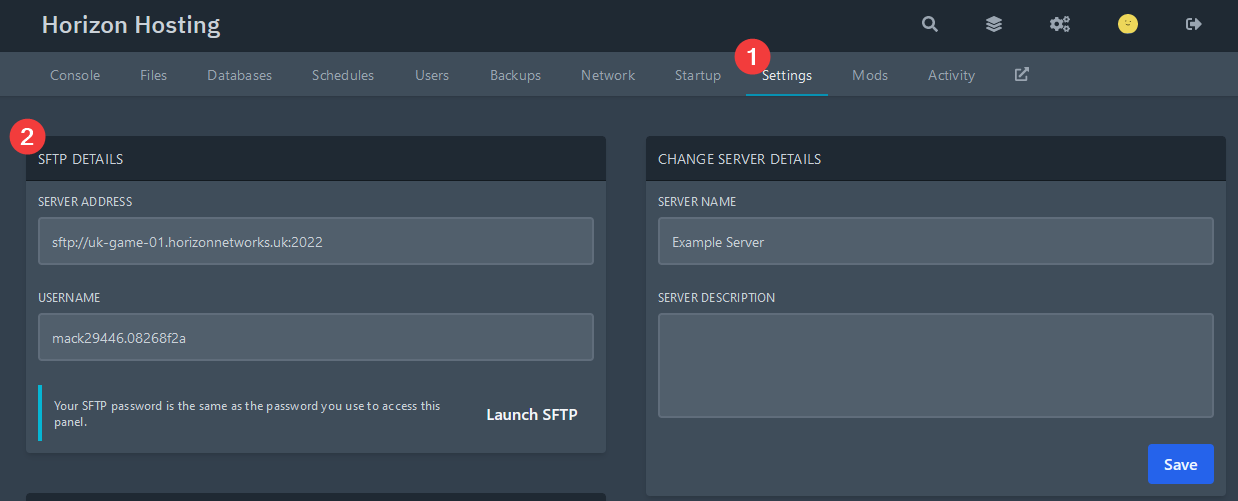
- Navigate to your server on the panel
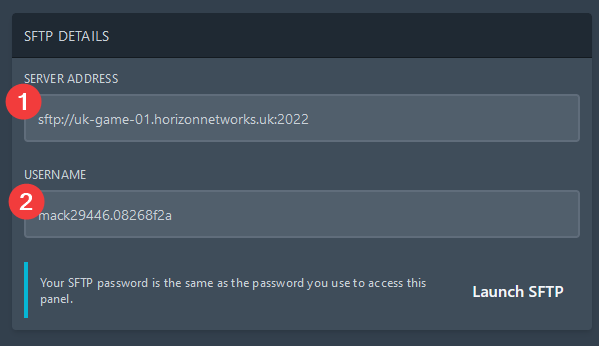
- Go to settings, and view the SFTP details
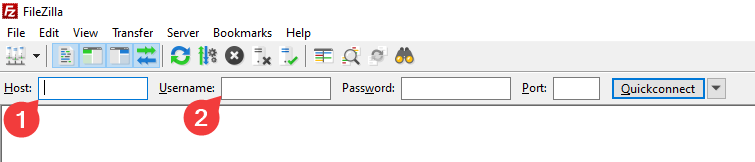
- Copy the server address, and paste it into the “Host” section on FileZilla
- Copy the username, and paste it into the “Username” section on FileZilla
- Enter your password - this is the same password you use to login to the panel
- Leave the port blank - this will be filled in automatically
- Click “Quickconnect”

You should now be connected to your server. The remote server files should be shown on the right-hand side.
If you do not see the files, or see errors in the status box, please check your password or contact us for further support.